

MILWAUKEE WI, USA,
October 15, 2026


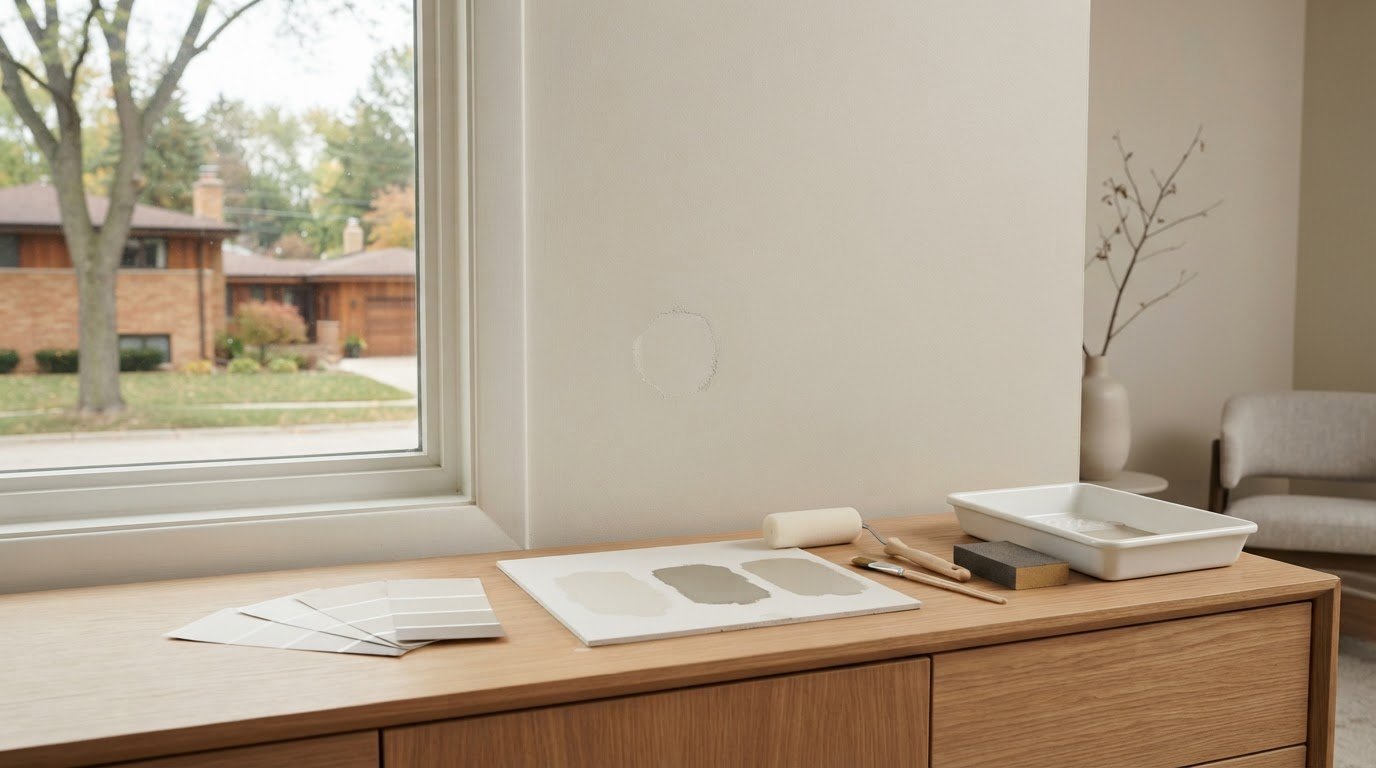
What if the paint is the right color, but the touch-up still stands out? A visible patch can be frustrating, especially when you don’t know the original brand or finish. Learning how to match paint for touch ups takes more than finding a color name: sheen, surface texture, lighting, and the paint’s age all affect how a repair looks once it dries.
Before opening a can, determine whether the mark needs cleaning, patching, or paint. This guide explains how to use paint records or a physical sample to find a close match, then test it on the wall before applying it more broadly. You’ll also learn how to prepare the surface and choose an application method that helps new paint blend. If the affected area is large or the surrounding finish has changed, repainting a broader area may be the more dependable option.
• First identify whether the mark needs cleaning, patching, or paint.
• To learn how to match paint for touch ups, search for paint records or use a clean sample from a discreet area as a color reference.
• Compare sheen, texture, lighting, and paint condition, since the right color alone may not blend with the existing wall.
• Test the paint, apply it sparingly with a suitable tool, and assess the result after it dries.
• Consider repainting the full wall when fading, multiple patches, or a noticeable finish difference makes a small repair stand out.
Matching paint starts with identifying what happened to the surface, not opening a can. A paint touch-up is a small, localized application intended to blend with an existing finish. It can work for a small area of missing or damaged paint, but it won’t remove dirt or correct an uneven patch underneath. First decide whether the mark is sitting on the paint, has changed the paint, or has exposed the surface below. This diagnosis helps you avoid painting over a mark that could be cleaned, or covering damage that needs preparation.
If a mark looks like dirt or a surface scuff, test a mild cleaning method in an inconspicuous spot. Use a soft cloth and light pressure, then let the area dry before judging the result. Rubbing too hard can alter the finish or spread the mark, making it harder to assess. If the mark lifts and the paint remains intact, repainting may not be necessary.
Missing, chipped, scratched-through, or flaking paint is different: cleaning won’t restore the coating. If a scratch exposes the layer beneath, or a previous patch has left a dip or rough edge, prepare the surface before matching color. Patching and careful surface preparation create a more even base. Where a repair exposes a bare or absorbent surface, primer may be needed before the finish coat. Follow the product directions for the materials you’re using.
Before looking for a new match, search for details from the original job. Check leftover cans, receipts, household project records, or saved notes. A color name is useful, but it may not identify the exact product or finish. The same named color can appear in different product lines, and a finish such as matte or eggshell affects how the wall reflects light.
Record the brand, color name or formula, product line, and finish from the label.
Look for the date and paint details, especially if the can label is difficult to read.
Check saved photos or records for the room, wall, and any later repainting.
These clues can narrow the search, but a remembered color name does not guarantee an exact match. Light and contrast can change how a color is perceived. The basic ideas in Color Theory help explain why paint can look different beside another color or under different lighting. Keep that in mind as you work out how to match paint for touch ups.
If no reliable records remain, write down what you do know before preparing a physical sample. Distinguishing a cleanable scuff from actual paint loss, and recording the original product details, gives the matching process a clearer starting point. It also helps prevent a new coat from hiding a problem that should be repaired first.
No can or label to refer to? You can still build a useful starting point by gathering records, preparing a sample carefully, and testing a proposed match at home. A color comparison can help narrow down the options, but it cannot guarantee that a small repair will disappear. The wall’s finish, texture, lighting, and age all affect the result.
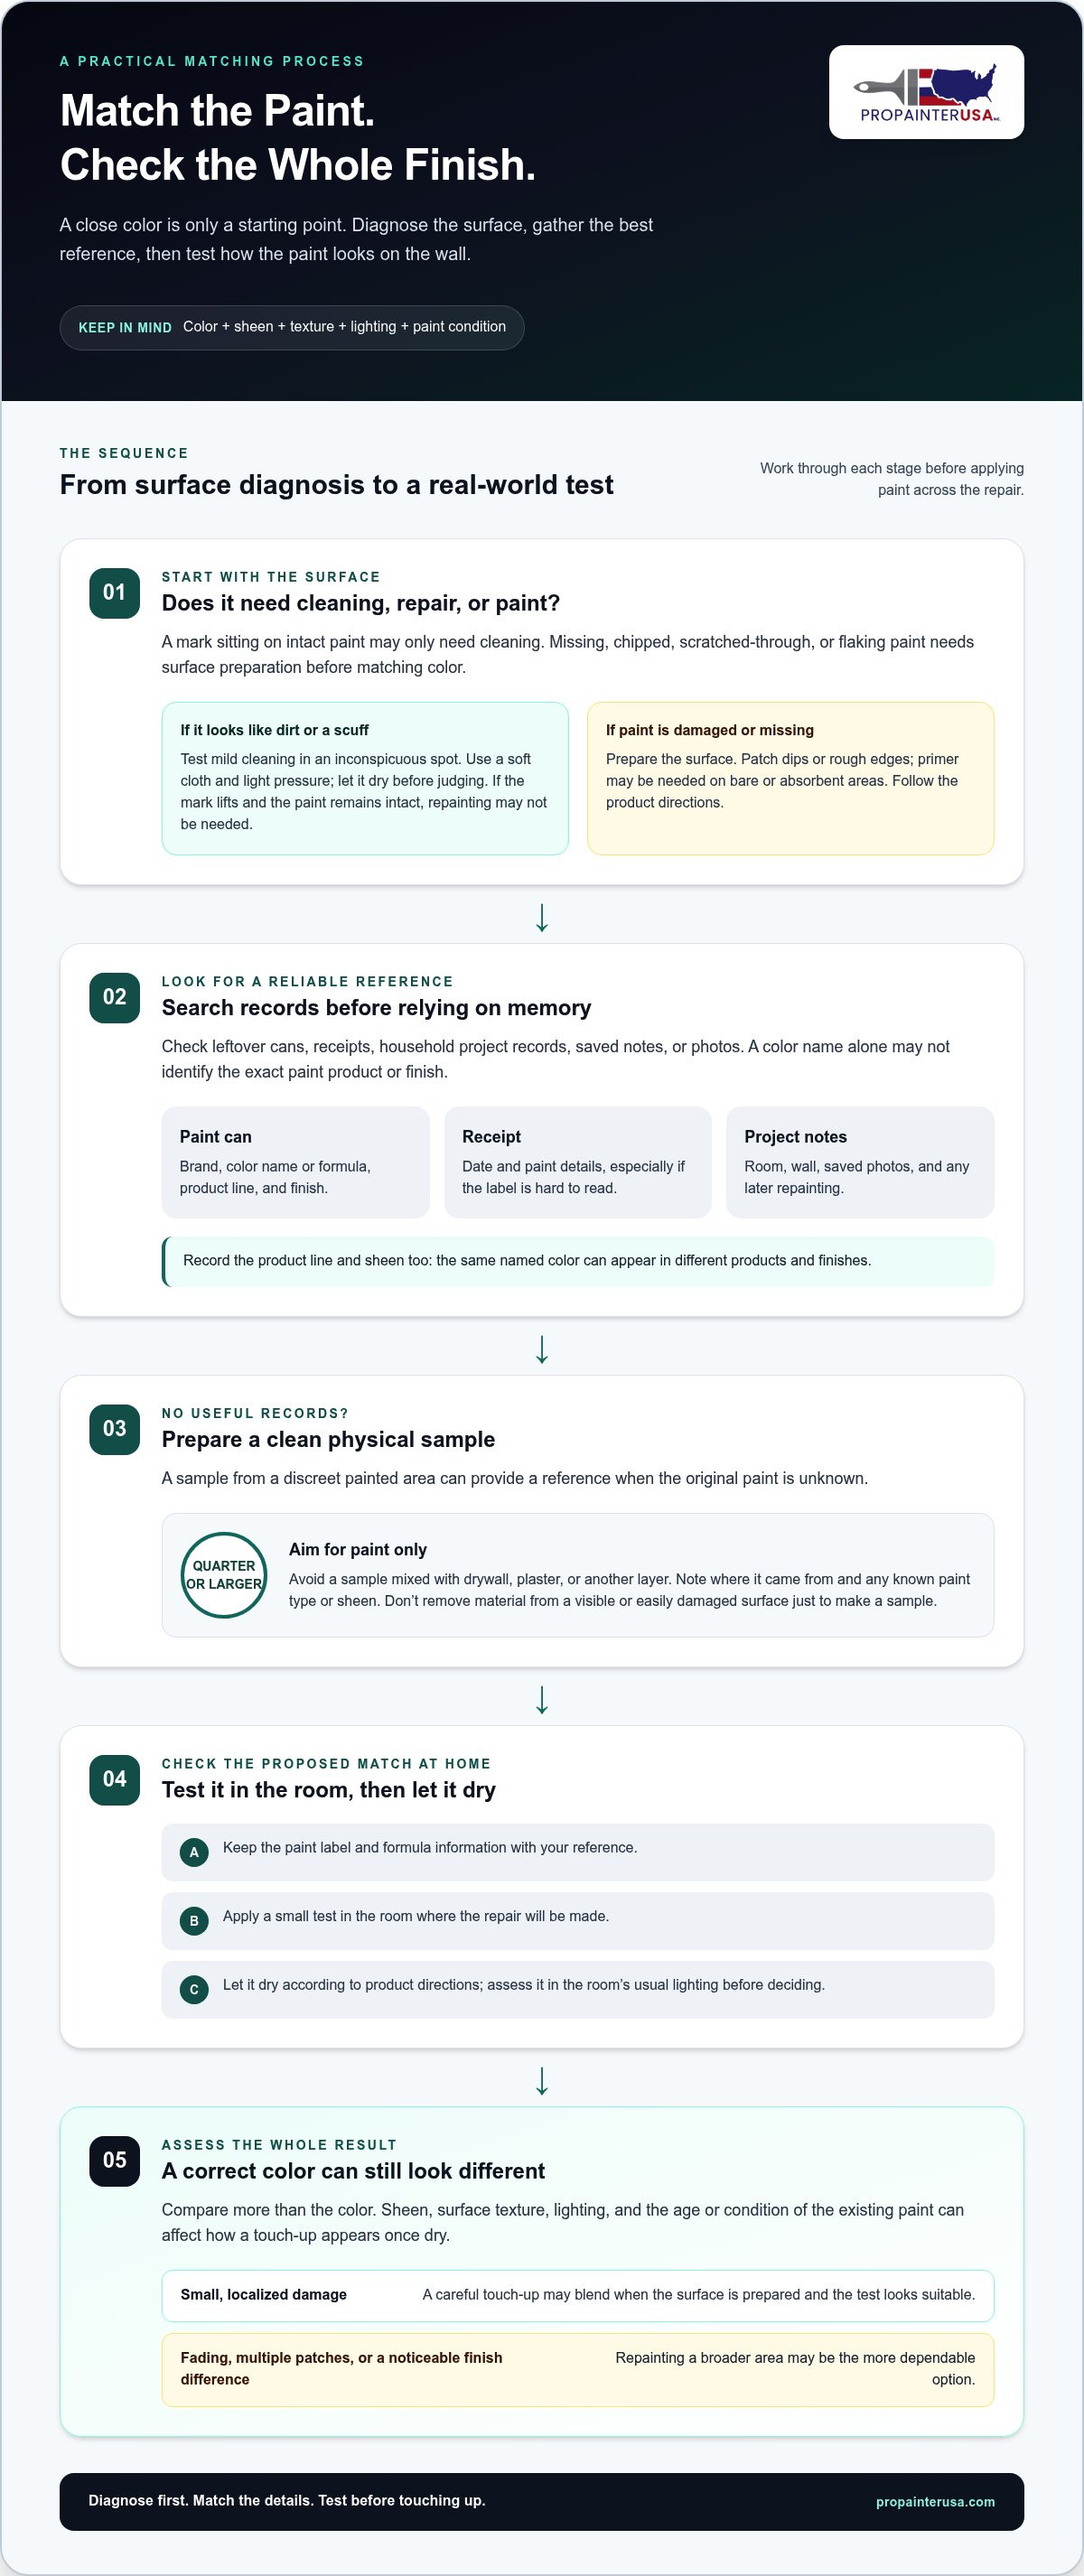
Use this sequence to narrow down the options without relying on color memory alone:
Look for saved labels, invoices, project notes, or a clearly identified color reference. Record the brand, product line, paint type, color name or formula, and sheen if you find them. A color name by itself may refer to more than one product or finish.
If records don’t identify the paint, a small, clean piece from an inconspicuous painted area can provide a reference. Aim for a paint-only sample, not one mixed with drywall, plaster, or another layer. A sample around the size of a quarter or larger gives more material to assess.
Note the sample’s location and any known information about the original paint, including its type and sheen. Don’t remove material from a visible or easily damaged surface just to create a sample.
Keep the label and formula information, then apply a small test in the room where the repair will be made. Let it dry according to the product directions and assess it in the space’s usual lighting before deciding whether it’s suitable.
Keep the prepared sample with any known brand, product line, paint type, color reference, and finish details. If you don’t have a physical sample, record the clearest information available, but bear in mind that a name or photo may be less conclusive than a piece of the actual painted surface. Save the resulting label or formula information with your household project records for future repairs.
A close color match doesn’t confirm a match in sheen or texture, and a sample may look different once it’s on your wall. Testing at home helps reveal those differences before you touch up the affected spot. For broader room-painting context, see this interior painting guide for Milwaukee homes. When the surface needs more than a small repair, careful patching and interior painting can help restore a more consistent finish. Learn more about professional painting and surface preparation.
A close color match is only one part of a touch-up. New paint can look like a different shade if it reflects light differently, sits on a different texture, or is compared with an older, worn area. Use the table to identify what may be making the repair stand out before adding another coat.
| Factor | How it affects the result | What to check |
|---|---|---|
| Color | A slight difference in hue or depth can make the repair visible. | Compare the dry sample with the surrounding wall, not only with a color card. |
| Sheen | A different amount of light reflection can make the spot look brighter or duller. | Identify the original finish instead of matching color alone. |
| Texture | A smooth or rough repair catches light differently from the surrounding surface. | Check whether patching or sanding changed the wall’s texture. |
| Lighting | Light direction and intensity can shift how colors appear. | View the test area under the room’s normal lighting. |
| Paint condition | Existing paint may have changed through wear, cleaning, or exposure. | Compare against the actual wall, not just a fresh sample. |
Sheen describes how much light a painted surface reflects. A low-sheen finish tends to look less reflective, while a glossier finish reflects more light. Even if the color is the same, a different sheen can leave a distinct spot that shifts in appearance as you move around the room. Look for the original finish on a paint label or project record where possible. Guessing from color alone can lead to a mismatch that another coat of the same paint won’t fix.
Yes. A sample viewed under store lighting may look different in the room, where daylight, lamps, and shadows influence how the color reads. Test it on the actual wall and assess it under your usual lighting, rather than judging it only while wet or in a different setting.
Texture matters, too. A roller leaves a different surface pattern from a brush, while sanding can leave a smoother patch that reflects light unlike the surrounding wall. Even a well-matched color may appear as a flat or shiny patch if the surface preparation and application don’t recreate the nearby texture. This is why how to match paint for touch ups involves checking the surface and finish as well as the color.
Finally, the existing coating may no longer look exactly as it did when freshly painted. Everyday wear, cleaning, and exposure can change its appearance, so a new sample may look brighter or cleaner beside it. Let the test dry according to the paint directions, then view it from different angles and at different times of day. If the repair still stands out, the difference may be in the sheen, texture, or condition of the surrounding paint rather than the color formula alone.
Careful application can help a close paint match blend, but rushing or adding too much paint can leave a raised, obvious spot. Work in stages: prepare the surface, test the paint, apply a small amount, and assess the result after it dries. If the test still looks noticeably different, pause and reassess rather than expanding the repair. The paint may not match the existing finish closely enough, or the surface may need more preparation.
Start with a clean, dry surface. Remove loose or damaged paint, and make sure any patch or sanded area is properly prepared before applying the finish coat. Test the paint in a discreet spot, using the tool you plan to use for the repair. Follow the product directions, allow the test to dry, then check it under the room’s typical lighting before proceeding.
Once the test looks suitable, follow this order for the repair:
Clean gently and let the surface dry. If paint is chipped or the wall has been patched, address the damage and smooth the repair before applying finish paint. A sound, even surface gives the new coat a better chance of blending.
Apply a small amount to a discreet spot and let it dry as directed. Compare it with the surrounding wall in the room, not just while it’s wet. Wet paint can look different from its dried appearance.
Use the original brush or roller if you have it, since the application tool can affect the surface texture. Put a small amount of paint on the tool, then work from the center of the damaged area toward its edges with a light hand.
Feathering means easing the paint outward at the edges so there isn’t a hard line around the repair. Use minimal paint as you move toward the intact finish. Avoid spreading the repair farther than necessary.
Follow the product directions for drying, then view the repair from different angles in typical room lighting. Add another light application only if needed and appropriate for the paint.
Begin with less paint than you think you need. It’s easier to build coverage gradually than to remove a thick dab or raised edge. Feather gently while the paint is workable, but don’t keep brushing or rolling over paint that has started to dry. That can disturb the finish and make the touch-up more visible. Follow the product instructions for application and drying.
If the dried test remains visibly different, stop before treating the whole mark. Recheck the color, sheen, surface texture, and preparation. Adding more coats may not solve the underlying mismatch. For an uneven or damaged area that needs careful patching and paint application, painting and surface repair can help create a more consistent finish.
A touch-up is most practical when the damage is small, the surrounding paint is in good condition, and you have a close match in both color and finish. If the repair keeps drawing your eye after it dries, adding more paint may not solve the problem. The existing wall may have faded, the sheen may differ, or the damage may extend beyond the spot you first noticed. In those cases, repainting a larger area can create a more consistent appearance, though no approach can promise an invisible repair. Established painting services like Colorado Springs Painters often recommend repainting entire sections when localized touch-ups fail to blend seamlessly.
Use the scale of the damage, the dried test, and the wall’s condition to decide. A localized repair may be enough for a small chip or mark when a suitable match is available. A broader repaint may be more practical when the wall has several patches, extensive fading, or a sheen difference that makes each spot stand out.
when the damage is limited, the surrounding finish is sound, and a small dried test blends reasonably well.
when several marks or larger patches are visible, the paint has faded unevenly, or a test spot looks noticeably different from the surrounding finish.
when paint is peeling, the wall is uneven, or damage extends beyond a simple scuff. A finish coat alone won’t correct an unprepared patch or damaged surface.
A painter can assess the damaged area alongside the surrounding finish, then determine whether the work calls for a small repair, patching, or preparation across a wider surface. That assessment matters when factors overlap, such as an uneven patch, worn paint, and a visible difference in sheen. Careful preparation creates a sound base for the finish coat, while consistent application supports a more even result. For high-contact fixtures like cabinetry and furniture where touch-up brush marks show easily, companies like Dee Valley Spray Solutions show how full respraying provides a seamless alternative when minor touch-ups fail to blend.
Pro Painter USA provides residential interior painting, patching, and surface preparation. With approximately 30 years of industry experience, its painters can address repairs that extend beyond a simple scuff and plan a larger repaint when spot touch-ups are no longer practical. For a repair that points to wider painting needs, view painting estimate options.
A touch-up doesn’t have to be perfect to improve a room, but a visible mismatch can be a sign to pause and choose a broader approach. If you’re still weighing how to match paint for touch ups, let the dried test guide your next move. A discreet repair may be all that’s needed, or the wall may benefit from preparation and a more consistent new coat.
There’s no need to keep layering paint over a spot that isn’t blending. A clear assessment of the surface can help you avoid extra work and decide what will leave the room looking cared for. Pro Painter USA provides residential painting and surface repair for homes in Milwaukee, Shorewood, Whitefish Bay, Fox Bay, Glendale, Fox Point, Bayview, Grafton, Cedarburg, Port Washington, Wauwatosa, Menomonee Falls, Richfield, West Bend, Hartford, Waukesha, New Berlin, Hales Corners, Oak Creek, and Cudahy.
For support with a repair or a larger interior painting project, request a painting estimate.
Yes, you can often find a close match without the original color name. Search for old labels, receipts, or project notes first; if they don’t help, a clean sample from an inconspicuous painted area can provide a useful reference. Include any clues you have, such as the likely finish. If you’re learning how to match paint for touch ups, treat the result as a candidate to test, since age and room conditions can affect the blend.
Yes, try gentle cleaning before reaching for paint. A dark mark near a doorway, for example, may be transferred dirt rather than missing coating. Test a mild cleaning method in a hidden spot and use light pressure; hard scrubbing can change the surface or spread the mark. Let the area dry before judging it. If the paint is chipped or the wall is exposed, cleaning won’t replace the missing coating.
Freshly applied paint can look different as it dries, so wait for the drying time stated on the container before deciding whether it matches. A mismatch can also remain because the new paint reflects light differently, the wall texture has changed, or the existing coating has aged. In a Milwaukee home, compare the dry test in the room’s usual light, including the time of day when the area is most visible.
Often, yes, if the leftover paint is identified as the one used on that wall and has been stored according to its product directions. Check the label for the color and finish, and inspect the paint for changes before using it. Stir it as directed, then test a small spot. Original paint can still look different beside an older wall if that surface has worn, been cleaned, or changed with exposure.
Look for a label, receipt, or project note that names the original finish, since a color reference alone won’t tell you how reflective the wall is. If the information is missing, compare a dry test with the existing surface under the room’s usual lighting. For example, a patch that appears brighter from one side may have a different sheen, even if its color looks close when viewed straight on.
Consider repainting a broader area if several marks, large repairs, or a persistently visible test spot make the wall look uneven. A small touch-up is more suitable when the damage is isolated and the surrounding paint is in good condition. If the wall needs patching or has an uneven surface, prepare it before painting. A painting professional can assess the repair and help plan the right scope for a Milwaukee-area home.
You might find these helpful:
We are a team of interior and exterior painters and we are not limited to house painting only. We can paint different businesses like retail shops, commercial buildings, and apartments.
We also provide restaurant painting services. We can give you more information about these services if you give us a call.


