

MILWAUKEE WI, USA,
October 20, 2026


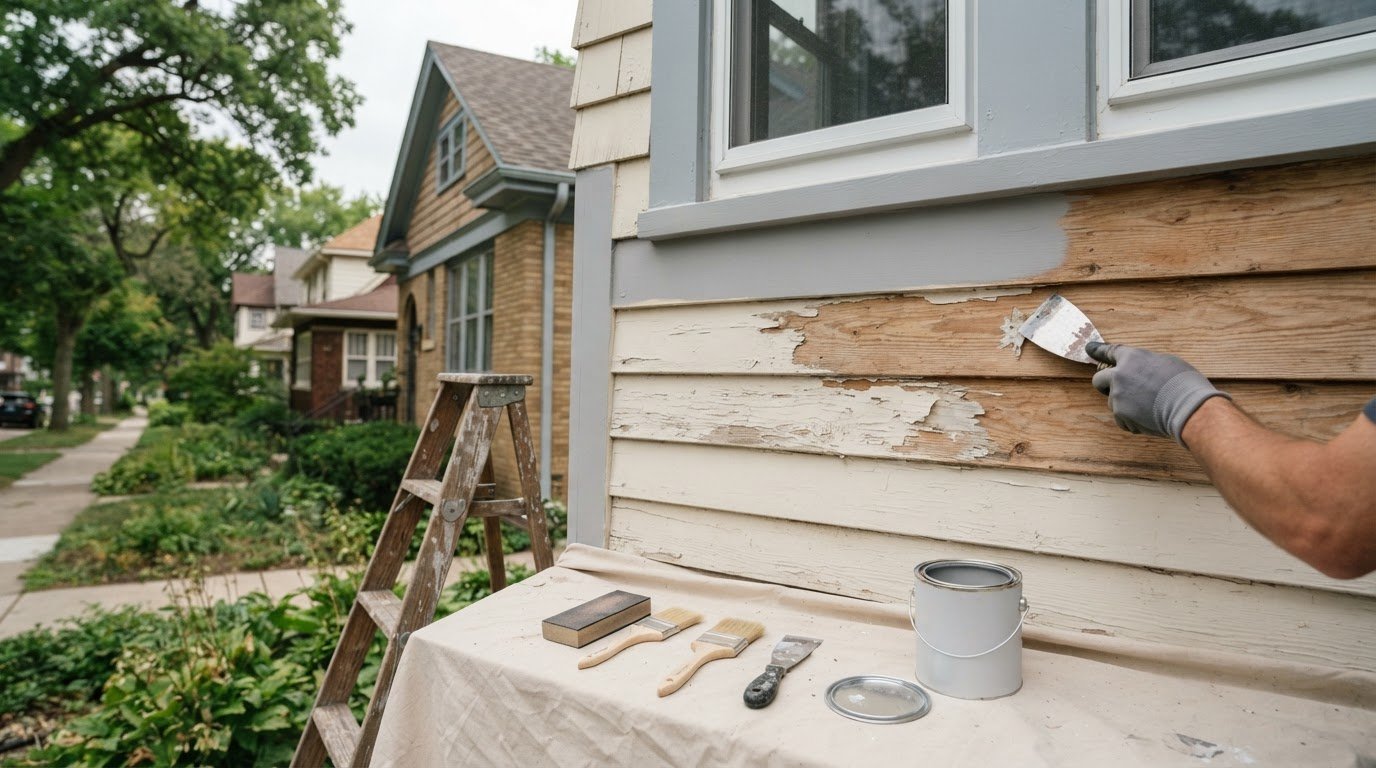
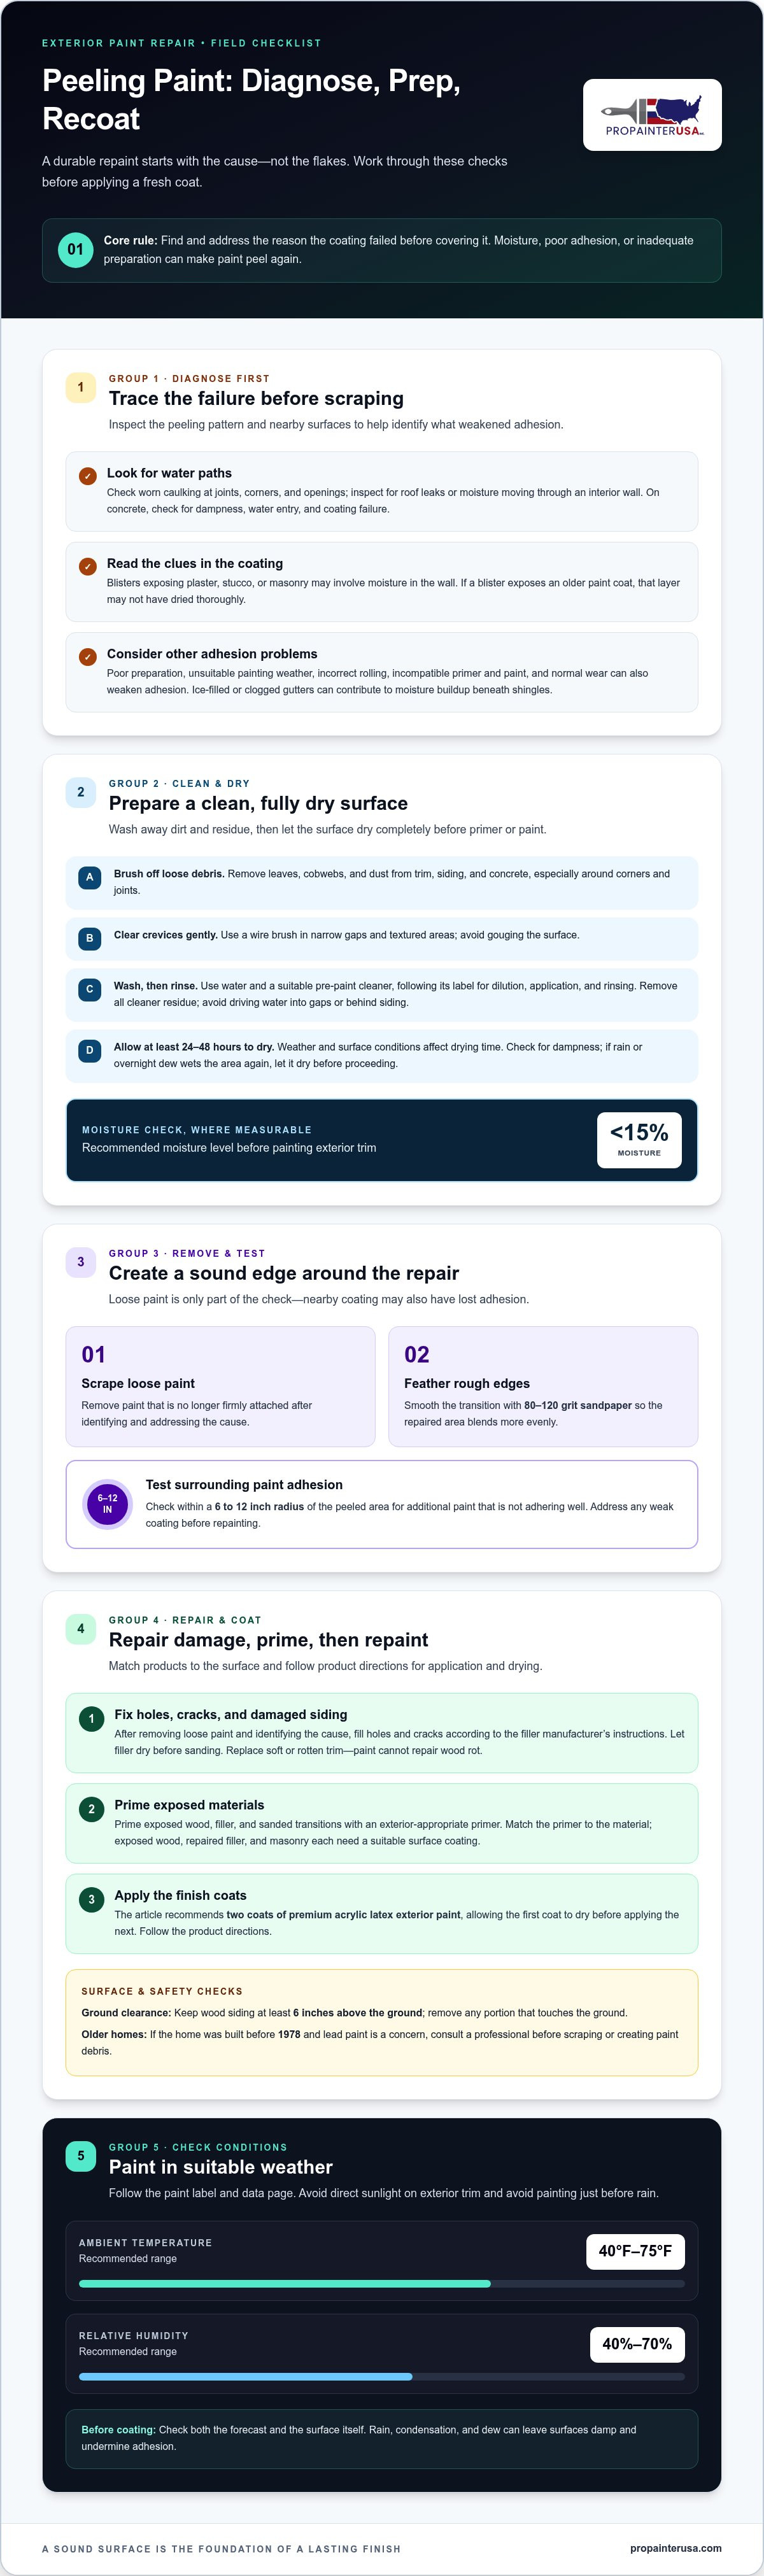
Peeling exterior paint is a warning to fix the surface, not simply cover it. To learn how to fix peeling exterior paint before repainting, find and address the cause, wash and fully dry the area, scrape away loose paint, feather rough edges, and test the surrounding coating within a 6 to 12 inch radius. Then prime exposed surfaces before applying new paint.
It’s tempting to focus on the flakes, but paint can peel again if moisture, poor adhesion, or inadequate preparation remains. The condition of the surface matters as much as the fresh coat you plan to apply.
This guide explains why exterior paint peels and how to prepare it step by step, from cleaning and drying to scraping, sanding, and testing nearby paint. You’ll learn what to inspect before repainting so you can plan for a clean, durable finish.
• Trace peeling to its likely cause, such as moisture, failed caulking, or poor surface preparation, before starting repairs.
• Wash the surface and let it dry completely; painting over damp siding or trim can lead to more peeling.
• Remove loose paint, then smooth the edges with 80-120 grit sandpaper so the repaired area blends more evenly.
• Prime exposed wood, filler, and sanded transitions with an exterior-appropriate primer before applying paint.
• Test the surrounding coating within a 6 to 12 inch radius to find any additional paint that isn’t adhering well.
Exterior paint peels when it loses adhesion, often because of moisture, poor preparation, or incompatible coatings. Understanding how to fix peeling exterior paint before repainting starts with identifying which condition is affecting the surface.
•
Inspect the peeling pattern and nearby surfaces before choosing a repair. Look for worn caulking at joints, corners, and openings, where water can enter. Check for roof leaks or moisture moving through an interior wall. Poor preparation, unsuitable painting weather, incorrect rolling, incompatible primer and paint, and normal wear can also weaken adhesion. If blisters expose plaster or stucco, moisture in the wall may be involved. If they expose an older paint coat, the underlying coat may not have dried thoroughly.
•
Trace water paths around trim, siding, and painted concrete before scraping. A dry surface can swell after getting wet, loosening the paint film, and bubbles that appear after painting can signal trapped moisture. On concrete, check for dampness, water entry, and coating failure before repainting. If a blister exposes masonry, moisture within the wall may be involved. Ice-filled or clogged gutters can also contribute to moisture buildup beneath shingles.
• Repair holes, cracks, and damaged siding after removing loose paint and identifying the cause. Fill cracks and holes according to the filler manufacturer’s instructions, then let the filler dry before sanding. Prime exposed wood and filler before painting. Replace soft or rotten trim, since paint can’t repair wood rot. Keep wood siding at least 6 inches above the ground; remove any portion that touches the ground. This is a practical part of how to fix peeling exterior paint before repainting without coating over damage.
• For older homes, address lead concerns before disturbing painted layers. If the home was built before 1978 and you’re concerned about lead paint, consult a professional before scraping. According to the Centers for Disease Control and Prevention, a lead paint inspection identifies lead content in painted structural parts, while a risk assessment identifies serious lead hazards and actions to address them. Avoid creating paint debris until that concern is addressed.
• Choose suitable weather conditions before repainting. Use ambient temperatures from 40°F to 75°F and relative humidity between 40% and 70%, while following the paint label and data page directions. Avoid painting exterior trim in direct sunlight or just before rain. Rain, condensation, and dew can leave surfaces damp and undermine adhesion. Check the forecast and the surface itself before beginning.
Wash exterior surfaces before applying primer or paint, then let them dry completely. Rain, condensation, and dew can leave moisture behind and contribute to peeling.
• Remove loose dirt and debris before washing. Brush leaves, cobwebs, and dust from trim, siding, and concrete, especially around corners and joints. A clean surface makes remaining flakes, chalky residue, and grime easier to spot. Keep debris from settling back onto the area as you work.
• Use a wire brush to clear dirt from narrow crevices and textured areas. Work gently around trim joints, siding grooves, and corners to remove debris without gouging the surface. Brush away what you loosen, then wash the area. A brush can reach places a cloth or sponge may miss.
• Wash the affected surface with water and a suitable pre-paint cleaner. Follow the label directions for dilution, application, and rinsing. Remove all residue, since leftover cleaner can interfere with primer adhesion. For a small trim section, work in manageable areas so you can rinse each part before the cleaner dries.
• Rinse the surface with clean water after washing. Check corners, grooves, and the underside of trim for cleaner or dirt residue, and rinse again if needed. Avoid directing water into gaps or behind siding. The goal is to clean the surface without driving moisture into the wall assembly.
• Allow washed exterior trim to dry for at least 24-48 hours before painting. Drying time depends on the surface and weather, so inspect for dampness rather than relying only on elapsed time. Don’t prime or paint surfaces still wet from rain, condensation, or dew. Where moisture can be measured, the research recommends a level below 15% before painting exterior trim.
• Plan the work around drying conditions and the paint label’s directions. Shade, airflow, and humidity affect how quickly washed siding or trim dries. If rain or overnight dew wets the surface again, allow it to dry before proceeding. Clean, dry surfaces help primer and paint bond as intended; for larger exterior projects, professional exterior painting can help address preparation across the property.
Once the surface is prepared, match the primer and paint to the material and conditions. Suitable products and proper drying between coats help the new finish adhere.
• Prime exposed wood, filler, and sanded transitions before painting. Apply primer evenly and follow the product directions, since coverage depends on the product and the surface’s porosity. Then apply two coats of premium acrylic latex exterior paint, letting the first coat dry before applying the next. Skipping primer on bare patches can cause uneven absorption and inconsistent adhesion.
• Choose primer and paint made for exterior surfaces. Interior products aren’t designed for the same exposure to changing weather and moisture. Acrylic latex paint is recommended for durability in humid environments. Match the primer to the material, too: exposed wood, repaired filler, and masonry each require a suitable surface for the coating to grip.
• Use a sealing primer when a porous surface needs sealing. On masonry, it can reduce porosity and help block moisture. After removing problematic paint, apply a suitable multipurpose latex primer to the prepared area. Choose products for their intended surfaces: a masonry sealer is not a substitute for primer designed for wood or other exterior materials.
• Let the primer dry according to its label before painting. Drying time varies by product and conditions, so follow the stated recoat guidance rather than judging by appearance alone. Primer that still feels tacky can mix with the finish coat or interfere with adhesion. Keep dust, debris, and moisture off the primed surface while it dries.
• Prime first, then caulk gaps in exterior trim. This order lets the primer cover the trim before caulk fills the joints. Choose exterior-use caulk and apply it to clean, dry gaps. Let it dry as directed before painting so the sealant and coating form a neat, continuous finish around openings and joints.
• Check the paint label and product information before choosing a painting day. Apply exterior products only within their stated environmental conditions, including temperature and humidity limits. Avoid direct sunlight and rain just before painting, since either can interfere with drying. On a large wall, divide the work into manageable sections and use the same product system throughout instead of combining unrelated primers and paints.
Remove loose or peeling paint with a scraper, then brush away debris and sand rough transitions. Replace siding that’s soft or rotten; scraping and repainting won’t repair damaged wood.
•
Work a paint scraper beneath cracked, lifting edges and remove coating that comes away easily. Don’t force the blade into sound paint or gouge the wood. Brush away flakes, then smooth the scraped area with fine-grit sandpaper. Continue until the remaining paint is firmly attached and the surface has no loose chips or raised edges.
•
Sand the border between bare areas and firmly adhered paint until the transition feels gradual. Use 80-120 grit sandpaper on exterior trim, moving across the edge rather than digging into one spot. Run your hand lightly over the transition to find ridges. A smoother edge helps the next coating lie more evenly and reduces visible outlines around repaired patches.
• Protect yourself and the work area before scraping older coatings. Wear sunglasses and a mask to protect your eyes and avoid breathing paint debris. Keep people away from falling flakes, and collect the debris as you go rather than leaving it around the foundation. If you’re concerned about lead paint in a home built before 1978, consult a professional before disturbing the coating.
• Check the exposed material after removing loose paint. Scraping works for sound siding with failed paint, but it can’t repair soft or rotten wood. Replace damaged trim or siding before painting, since paint won’t restore the wood’s strength. If the material is still firm, remove only unstable paint and leave well-adhered coating in place.
• Brush away sanding dust and paint fragments before moving to the next preparation step. Inspect the scraped area in good light, including corners and grooves where small flakes can remain. If an edge still lifts, remove that loose section and sand the transition again. Once the surface is clean and stable, check adhesion in the surrounding paint before priming.
Treat loose or cracked paint as material to remove, not as a base for fresh paint. Painting over it can leave an uneven texture, and the cracking may return. A new coat is no substitute for removing failed paint. Scrape off unstable coating, brush away debris, and smooth the surface with fine-grit sandpaper. Aim for a clean surface without loose debris or sharp, raised edges. Paint that remains firmly attached can stay in place.
Wear sunglasses and a mask while scraping, brushing, and sanding to protect your eyes and avoid breathing in paint debris. Check the area as you work: remaining flakes or raised edges mean loose coating still needs removal. Don’t try to hide unstable paint beneath another layer. Once you’ve brushed away debris and smoothed the transition, check the area against the surrounding firmly attached paint before continuing.
Paint can fail beyond the visible peeled patch. Test the surrounding coating before deciding how far to prepare, so loose sections aren’t left beneath the new finish.
• Inspect the coating within a 6 to 12 inch radius of each peeled area. Look for fine cracks, bubbles, lifting edges, or discoloration that continues beyond the obvious damage. Check trim corners, joints, and nearby siding separately, since peeling may follow a moisture path rather than form one neat patch. Mark areas that need closer attention.
• Gently probe questionable paint edges with a scraper. Firmly attached paint should stay in place; if an edge lifts or flakes with light pressure, remove the loose section. Don’t force the blade beneath sound paint. The goal is to find weak adhesion, not strip every layer from the wall.
• Test each side of the repair rather than checking only the center. Examine the top, bottom, and both ends of a peeled trim section, including the transition where paint meets bare wood. If one edge releases easily, inspect farther in that direction. Repeat the adhesion check within the same 6 to 12 inch radius around the affected area.
• Distinguish paint failure from substrate damage before deciding what to repaint. If the coating comes off but the wood beneath is firm, remove unstable paint and prepare the exposed surface. If trim feels soft or rotten, paint won’t fix the underlying damage. Replace compromised wood before coating it, and trace any moisture entry that could weaken nearby paint.
• Recheck the boundary after removing paint that failed the adhesion test. Brush away flakes and look for another lifting edge around the exposed patch. Continue outward only where the coating loosens, and stop where paint remains firmly attached. This limits unnecessary scraping while ensuring the repair doesn’t end at an unstable edge.
Once surrounding paint holds firmly, the prepared area can move on to priming and repainting. For a larger exterior project with peeling across multiple surfaces, plan your exterior painting project with professional support.
An adhesion check shows where paint is no longer secure, but it doesn’t identify the cause of failure on its own. Consider the observed pattern as you assess the repair, and don’t assume every loose edge has the same cause. Exterior paint can peel because of poor wall preparation, moisture inside walls, incorrect rolling techniques, unsuitable painting weather, adhesion failure, incompatible primer and paint, or normal wear. Weigh these possibilities against the exposed surface and nearby coating. If lifting appears at several edges, note the locations before preparing them and consider whether the repair needs to address more than the loose paint. Then continue with a firm boundary and a properly prepared surface rather than simply covering the peeled area.
Pro Painter USA provides Residential Exterior Painting for homeowners preparing to renew peeling or weathered paint. Consider professional help when repairs span multiple surfaces, trim needs careful preparation, or you want a coordinated approach from surface assessment through the finish coat. Fixing peeling paint takes more than applying a fresh layer: the surface must be clean, dry, stable, and properly primed. Pro Painter USA also provides Commercial Exterior Painting for business properties. For homes and commercial buildings, coordinated preparation and painting can bring exterior surfaces together with consistent workmanship.
Contact Pro Painter USA to discuss your exterior painting project, or visit propainterusa.com.
Use the repair as a starting point for a more deliberate exterior maintenance routine. Keep a simple record of areas where paint has peeled, blistered, or separated, along with nearby trim joints, openings, and roof edges. This can help you see whether damage keeps returning in the same place and focus attention on a likely source. A fresh coat is only one part of maintaining a property’s appearance. Paying attention to changes in the surface can help you plan future work before peeling spreads.
When considering how to fix peeling exterior paint before repainting, look at the project as a whole. If several elevations, trim areas, or exterior surfaces need attention, coordinated preparation and painting can create a more consistent result. Pro Painter USA provides Residential Exterior Painting, as well as Residential Interior Painting and Commercial Interior Painting for other property needs.
For a clear next step, contact Pro Painter USA about your painting project. With a thoughtful plan, you can move forward with confidence and take pride in your refreshed property.
Exterior paint peels when it can’t stay bonded to the surface. Moisture entering through failed caulking, a roof leak, or a damp wall can weaken that bond. Poor preparation, incompatible coatings, or unsuitable painting weather can also contribute. For example, peeling below a window may point to water entering around the trim, while widespread failure can suggest a broader surface or moisture problem.
Use a hand scraper with controlled pressure, removing paint that lifts easily without cutting into sound wood. Wear eye protection and a mask, and collect flakes as you work so debris doesn’t spread. Sand the transition between bare and painted areas with 80-120 grit sandpaper, keeping the paper flat against the surface. If the material beneath the paint feels soft or crumbles, stop and address the damaged substrate before repainting.
Work in manageable sections: wash away dirt and residue, rinse each section with clean water, then let the surface dry completely before priming. A pre-paint cleaner can help remove grime, but follow its label and rinse as directed. Use a wire brush to clear debris from grooves and trim corners. Before priming, check shaded areas and joints for lingering dampness or residue.
You might find these helpful:
We are a team of interior and exterior painters and we are not limited to house painting only. We can paint different businesses like retail shops, commercial buildings, and apartments.
We also provide restaurant painting services. We can give you more information about these services if you give us a call.


