MILWAUKEE WI, USA,
October 13, 2026


Can the wrong paint color damage vinyl siding even when the application looks flawless? It can, which is why the best way to paint vinyl siding starts with more than choosing a fresh shade. The siding needs to be sound, the paint must be suitable for vinyl, and the surface has to be clean and ready before you start. Weather matters, too: applying paint in unsuitable conditions can affect how it dries and holds up.
If you’re unsure whether your siding is a good candidate, or how to avoid peeling, poor coverage, or heat-related damage, a careful plan can make the project more manageable. This guide covers how to assess the siding, choose compatible paint and color, prepare the surface, and apply a durable finish while accounting for changing weather. It also explains when the siding’s condition or the project’s scope makes experienced help a sensible choice. Pro Painter USA brings approximately 30 years of painting experience to exterior projects, including the inspection and preparation that support a clean finish.
• The best way to paint vinyl siding starts with checking whether the panels are sound enough to paint, rather than treating every faded exterior the same way.
• Choose paint specifically suited to vinyl, and consider how color and heat absorption may affect the siding.
• A methodical preparation sequence helps address dirt, mildew, chalking, and other residue before painting begins.
• Weather and product directions influence when and how to apply paint, so plan around suitable conditions and follow the label for application and drying.
• For larger, difficult-to-access, or repair-heavy projects in Milwaukee, Pro Painter USA provides residential exterior painting and surface preparation, backed by approximately 30 years of industry experience.
Yes, vinyl siding can be painted when it’s in sound condition and the paint system’s instructions support using it on that surface. Faded color alone may be a cosmetic issue, not a sign that the siding has failed. But paint is a finish, not a repair: it won’t secure loose panels, fix cracks, stop moisture, or correct damage hidden beneath the surface.
Paintable vinyl siding is clean, securely attached, and free of unresolved damage, with painting permitted by the siding maker’s guidance and supported by the paint manufacturer’s instructions. Make that assessment before choosing a color or buying paint.
Look for panels that sit firmly in place and appear intact, without widespread cracking, brittleness, or distortion. Fading or uneven color may simply reflect years of exposure. Inspect the whole exterior rather than judging by its most visible wall. Check corners, seams, areas near doors and windows, and lower sections where water or debris can collect.
Clean the siding and inspect it closely before settling on paint or color. Dirt and residue can obscure the surface, while a closer look may reveal damage that wasn’t obvious from a distance. If the siding manufacturer’s care or painting instructions are available, use them to understand any restrictions. Vinyl siding’s composition and characteristics also matter. Vinyl Siding on Wikipedia provides background on the material, but the siding maker’s instructions should guide decisions about your specific product.
Pause the paint plan if you find loose or displaced panels, significant cracks, damaged trim, or signs of moisture. These conditions need investigation because a visible problem may point to an issue beyond the surface. Painting over it could hide a defect without addressing its cause, and the finish may not perform as intended over an unstable or damp area.
• Note where panels are loose, cracked, or distorted.
• Record damaged trim, open joints, or areas with discoloration that may indicate moisture.
• Photograph each concern and note whether it appears in more than one location.
Documentation helps distinguish isolated cosmetic wear from a broader repair need and gives you a useful record as you plan next steps. Don’t treat a fresh coat as a substitute for repairing failed siding or resolving moisture problems. Once concerns have been assessed and addressed, you can decide whether painting is appropriate for the remaining surface. This inspection-first approach is central to the best way to paint vinyl siding: confirm the material is ready before planning the finish.
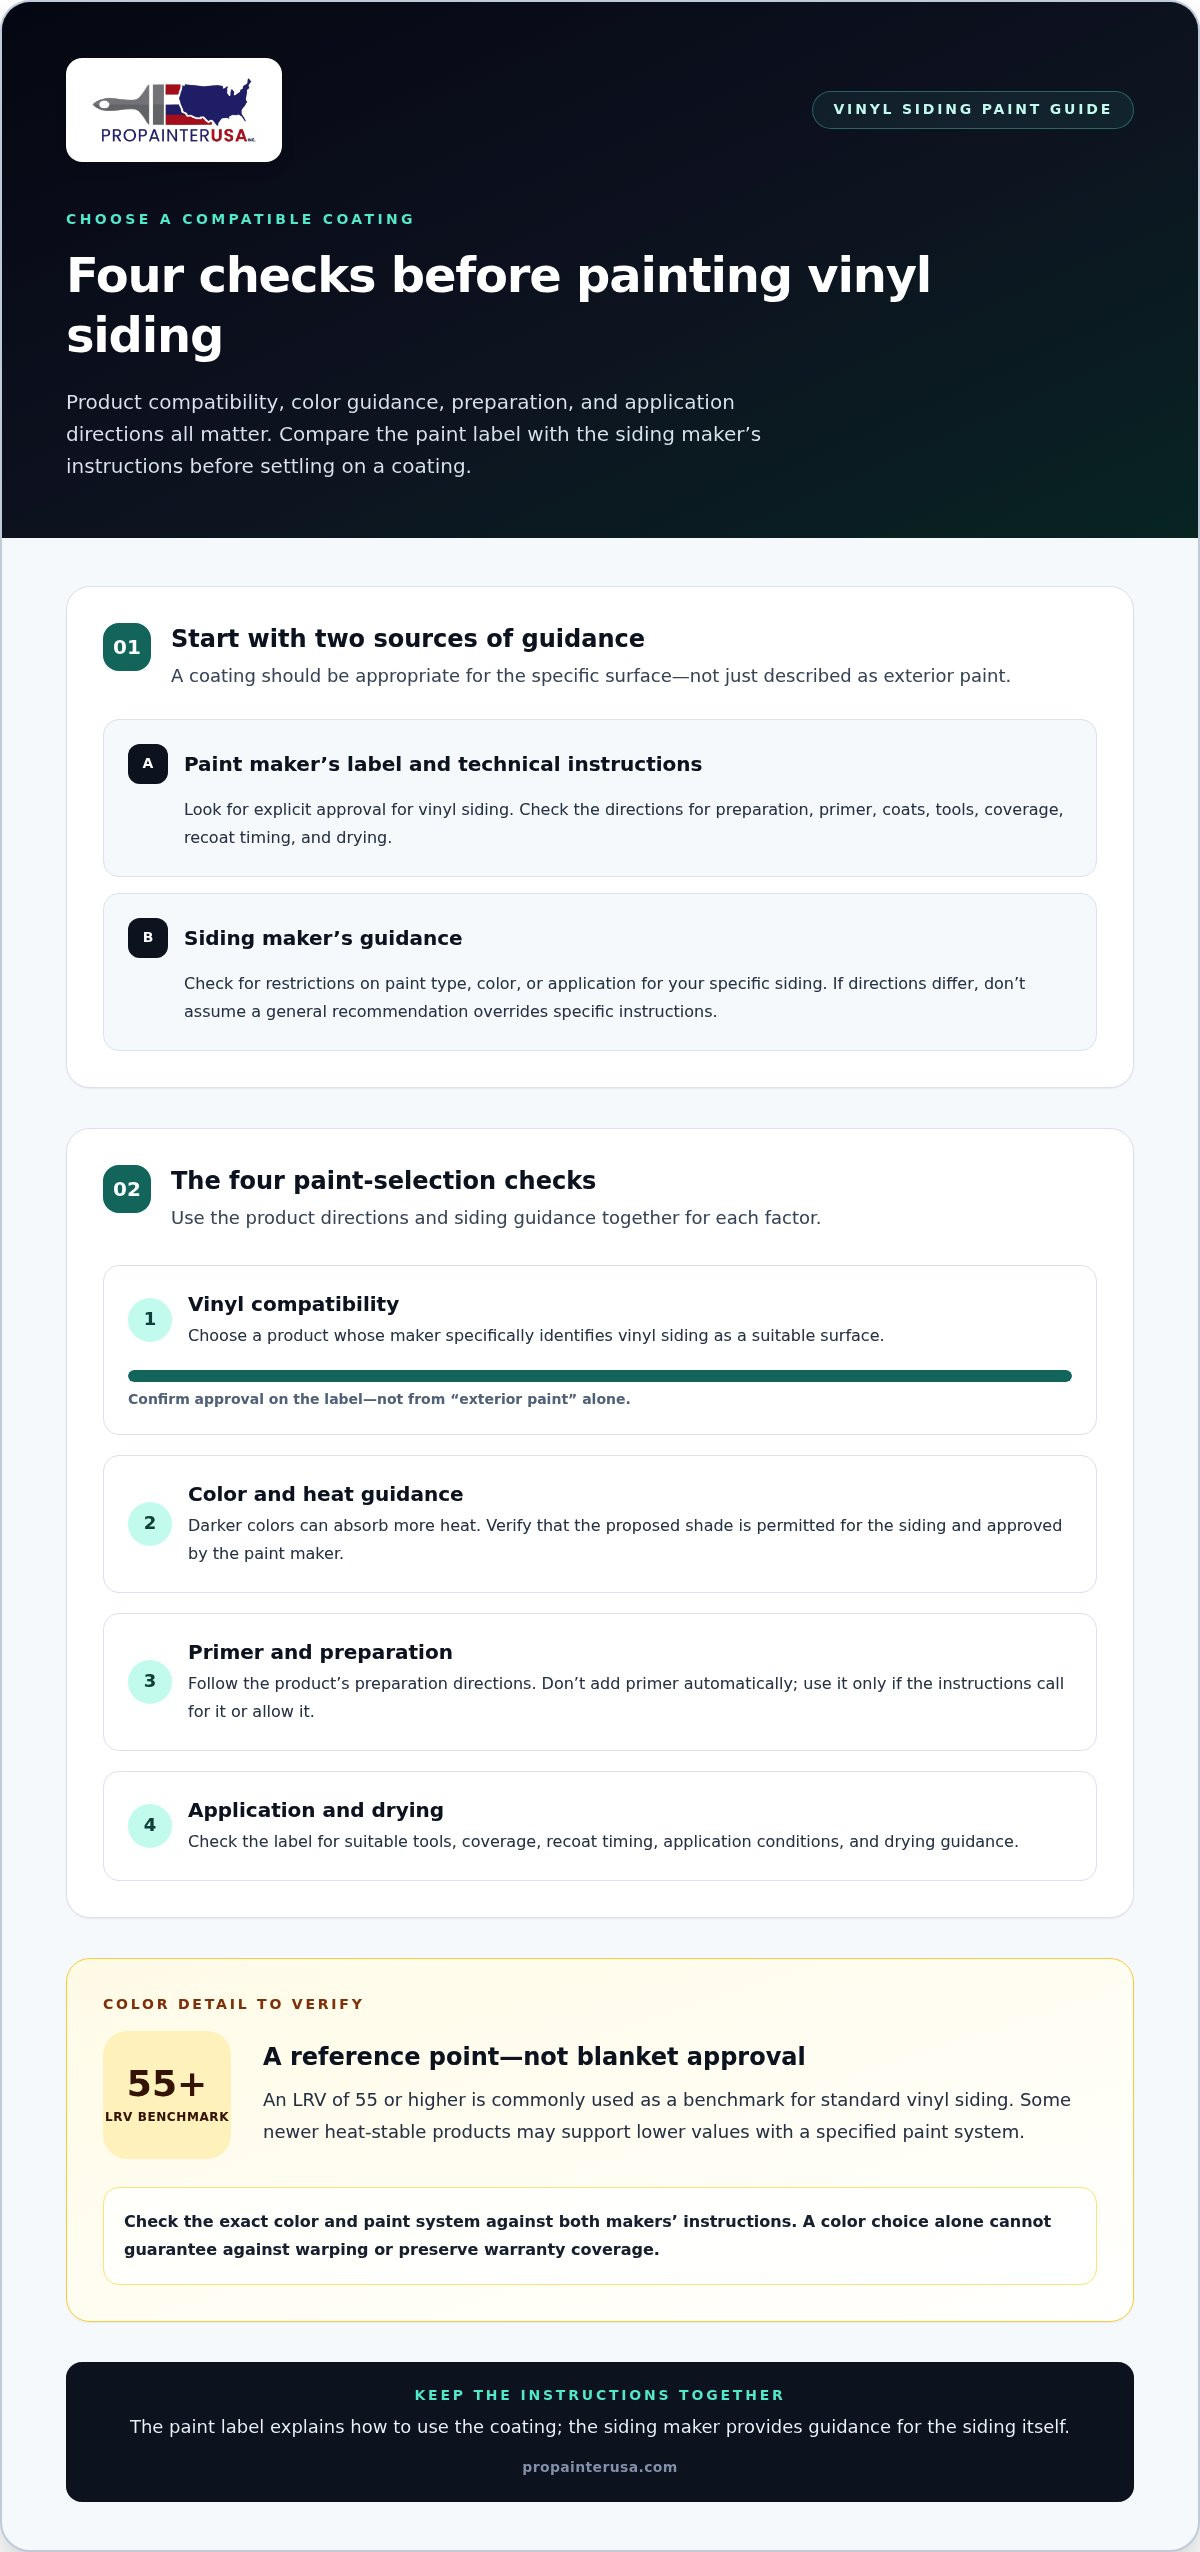
Once the siding is suitable for painting, choose a coating intended for that surface. “Exterior paint” describes where a product is used, but doesn’t necessarily mean it’s appropriate for vinyl. Look for vinyl siding on the product label or technical instructions, then compare those directions with the siding maker’s guidance. Follow any limits on paint type, color, or application for the specific siding and paint system.
Exterior acrylic paint may be suitable when its manufacturer specifically identifies vinyl as an approved substrate. The broad category alone isn’t enough: formulas and application requirements vary. Read the label for directions about primer, number of coats, surface preparation, tools, and application conditions. Don’t add primer automatically. Use it only if the product instructions call for it or allow it as part of the system.
A general exterior-paint description doesn’t replace explicit vinyl approval. Compare the product label with the siding maker’s instructions. The label explains how the paint is meant to be used, while the siding maker provides guidance for the siding itself. If the directions differ, don’t assume a general recommendation overrides specific instructions. This comparison keeps product selection grounded in compatibility, not appearance alone.
Darker colors can absorb more heat, so changing from a light original shade deserves extra care. Check the siding manufacturer’s limits and whether the paint maker approves the exact proposed color for that vinyl. An LRV of 55 or higher is commonly used as a benchmark for standard vinyl siding, while some newer heat-stable products may support lower values with a specified paint system. Treat these as prompts to check product-specific guidance, not blanket approval. A color choice alone can’t guarantee against warping or preserve warranty coverage.
| What to compare | What to look for |
|---|---|
| Compatibility | The paint maker specifically names vinyl siding as a suitable surface. |
| Color guidance | The siding and paint instructions address the intended shade or its LRV. |
| Preparation | Directions explain whether primer is required, optional, or unnecessary. |
| Application conditions | The label states the appropriate tools, coverage, recoat timing, and drying guidance. |
Keep the paint label and siding instructions together as you plan. They’ll guide preparation and application. When product directions are hard to reconcile, an experienced exterior painter can help assess the surface and plan the coating system. Pro Painter USA brings approximately 30 years of painting experience to residential exterior projects. Homeowners can learn about exterior painting support.
A fresh coating needs a clean, dry surface to bond as intended. Dirt, mildew, chalking, and cleaning residue can interfere with adhesion, even if the siding looks ready from the ground. Work methodically, using cleaning products and methods compatible with the siding. Avoid aggressive scrubbing or washing that could damage the panels or drive water behind them.
Clean, dry vinyl gives paint a sound surface to grip. Coating over dirt, residue, or lingering moisture can compromise the finish. The best way to paint vinyl siding includes preparation in a clear order:
Check the siding and trim for missed damage, loose sections, mildew, chalky residue, or other trouble spots.
Use a siding-compatible cleaning method to remove grime and surface contamination, following the cleaner’s directions.
Rinse thoroughly so cleaner and loosened residue don’t remain on the surface.
Allow the siding to dry as directed by the paint and cleaner instructions before moving on.
Cover nearby plants, fixtures, windows, and walkways from cleaning spray and paint.
Apply the planned coating to a small, inconspicuous area to check its appearance and application.
Start by removing ordinary contamination, including dust, dirt, and residue in panel grooves and around trim. If mildew or chalking is present, use an appropriate cleaning method rather than painting over it. Follow the siding and cleaner instructions, and rinse carefully to clear loosened material without forcing water behind the panels. Let the siding dry for the period required by the product directions. A surface that feels dry in one spot may still hold moisture elsewhere, so check shaded areas and joints before coating.
Before painting, move or cover items near the work area and protect plants, windows, fixtures, and walkways. Mask edges where needed, taking care not to block drainage paths or trap moisture against the siding. Apply the selected coating to a small, hidden section as directed, then let it dry before judging the color and finish. The test can reveal an unexpected appearance or application issue before you cover a larger wall.
Use your inspection notes to decide whether the surface is ready. If cleaning reveals soft or damaged wood around trim, pause and address the repair before painting. A coating won’t correct underlying deterioration. Pro Painter USA provides exterior surface preparation and repairs as part of its residential painting work, helping homeowners prepare a sound foundation for the finish.
Once the surface is prepared and the coating selected, steady application and good timing help create an even finish. Mask nearby areas and arrange your tools before opening the paint. Check the forecast as well as the siding itself: rain, damp surfaces, or temperatures outside the product’s stated limits can interfere with application and drying.
For Milwaukee-area homeowners, mid-May through mid-October is generally a useful window for exterior painting. Conditions still vary from day to day, so follow the paint label’s temperature and weather requirements rather than relying on the calendar alone. The best way to paint vinyl siding is to work methodically and let the product instructions guide each step.
Follow the product label for approved tools, coverage, coat count, and recoat timing. Work in manageable sections, moving consistently along the siding courses so you can maintain a wet edge and see where you’ve painted. Whether you use a brush, roller, or sprayer, apply an even coat without leaving heavy buildup at panel edges, seams, or joints.
Check the surface as you go. Thin or missed areas may stand out after drying, while excess paint can collect around overlaps and details. Apply additional coats only as directed, and allow the required time between them. Don’t cover a section that’s still tacky or hasn’t reached the recoat point specified by the manufacturer.
Rain can affect fresh paint, while damp siding may prevent it from drying as expected. Temperatures outside the product’s stated range can also disrupt application or curing. Plan for suitable weather throughout the work and drying period. In Milwaukee, changing conditions make it especially useful to check both the forecast and the label before starting.
Confirm the surface is dry, mask nearby areas, and gather the tools approved for the selected paint.
Work steadily across siding courses, keeping coverage even and avoiding heavy deposits at overlaps.
Follow the label’s instructions for coat count and the time required between coats.
Let the paint dry as directed, then look for thin spots, drips, uneven coverage, or areas that need attention.
Inspect from several angles in good light once the finish has dried. A final check can reveal uneven coverage or drips that were hard to spot while the surface was wet. Pro Painter USA brings approximately 30 years of painting experience to residential exterior projects, including surface preparation and repairs. Request a free painting estimate to discuss your siding project.
A vinyl siding project may be manageable as a DIY job when the home is easy to access, the siding is in good condition, and you have time to handle preparation and painting carefully. Professional help can make more sense when the exterior is large, upper walls are difficult to reach, repairs are needed, or you want a consistent finish across several elevations. The best way to paint vinyl siding depends on the home as much as the coating, so weigh the scope and surface condition before deciding how to proceed.
Experienced painters approach the work in stages: inspect the exterior, identify areas that need attention, prepare the surface, then apply paint with the chosen product’s directions in mind. That sequence helps prevent repairs and preparation from being overlooked in the rush to start painting. Pro Painter USA provides residential exterior painting, surface preparation, and repair work, backed by approximately 30 years of industry experience.
Consider professional help if the project includes several of these challenges:
• Large or multi-story siding areas that are difficult to reach safely and evenly.
• Loose panels, damaged trim, or other surface issues that need attention before coating.
• A finish expectation that depends on consistent coverage across visible walls and detailed areas.
• Limited time or equipment for cleaning, protecting nearby surfaces, and applying the paint as directed.
These factors don’t automatically rule out a DIY approach. They help clarify the work involved and whether you’re comfortable managing each stage, including access, preparation, application, and final inspection.
An estimate offers a practical starting point for discussing your home’s siding, its condition, and any preparation or repair work it may need. It can also frame the project around the surfaces involved and your finish goals, rather than treating every house as the same job. For broader planning context, consider how the scope of a home’s exterior affects a Milwaukee house painting estimate.
Pro Painter USA is locally owned and serves Milwaukee and communities throughout Wisconsin, including Shorewood, Whitefish Bay, Fox Bay, Glendale, Fox Point, Bayview, Wauwatosa, Menomonee Falls, Grafton, Cedarburg, Port Washington, Richfield, West Bend, Hartford, Waukesha, New Berlin, Hales Corner, Oak Creek, Cudahy, and South Milwaukee. To have experienced painters assess the project and handle the exterior work, request a free painting estimate from Pro Painter USA online or by phone. A clear understanding of the siding’s condition and project scope is a sound place to begin.
A successful exterior update starts with a clear idea of what you want from the project: a refreshed appearance, a new color direction, or a finish that brings the whole home together. Before work begins, note any areas that need attention and the results you hope to achieve. That gives you a practical basis for deciding whether to take on the work yourself or bring in experienced help.
The best way to paint vinyl siding is the approach that respects the material and fits your home’s condition, your expectations, and the time you can commit. Don’t rush into a color or start painting before you’re ready. Thoughtful planning can help you move ahead with greater confidence.
For professional guidance on your exterior project, arrange your free exterior painting estimate. A conversation about your home can help clarify the next step, whether you’re still weighing options or ready to plan the work.
Yes, vinyl siding can be painted if it’s in sound condition and the coating is approved for vinyl. Inspect the panels, including less visible walls and areas under windows, where wear or damage may be easy to miss. Painting won’t fix a loose panel or moisture problem. If you find damage, determine what needs attention before treating the surface as ready for a new finish.
Choose an exterior paint whose manufacturer specifically approves it for vinyl siding. A label that says “exterior” alone doesn’t establish compatibility. Read the full product directions, including whether the coating is intended for your siding’s current finish and what preparation it requires. For example, if one product specifies primer and another permits direct application, don’t combine instructions casually. Select a coating system whose directions fit the surface and project.
Not always. Primer depends on the siding’s condition and the selected coating’s instructions, so it shouldn’t be added automatically. Some products specify a primer, while others may describe direct application. Read the label before purchasing materials, and follow the stated system for the full project. If the siding has uneven areas or repairs, consider how those conditions affect the coating instructions before deciding what to apply.
Begin with a close inspection, then remove dirt and residue using a cleaning method suitable for the siding. Rinse without forcing water behind the panels, and let the surface dry according to the coating directions. Before full application, protect nearby surfaces and test the planned paint in an inconspicuous spot. If cleaning reveals a defect, address it first. Preparation should make the surface ready, not hide a repair need.
Choose a dry stretch when the siding can stay dry through application and the paint’s specified drying period. Check the label for temperature, humidity, rain, and recoating limits, since requirements vary by product. For Wisconsin projects, a clear forecast at the start isn’t enough if conditions may change before the coating dries. Delay work if the surface is damp or the expected weather falls outside the product’s directions.
Professional help can be useful for large exteriors, difficult access, visible damage, or a finish that needs consistent coverage across multiple elevations. Pro Painter USA serves homeowners in Milwaukee and nearby communities, including Shorewood, Whitefish Bay, Fox Bay, Glendale, Fox Point, Bayview, Wauwatosa, Menomonee Falls, Grafton, Cedarburg, Port Washington, Richfield, West Bend, Hartford, Waukesha, New Berlin, Hales Corner, Oak Creek, Cudahy, and South Milwaukee. Request a free estimate online or by phone.
You might find these helpful:
We are a team of interior and exterior painters and we are not limited to house painting only. We can paint different businesses like retail shops, commercial buildings, and apartments.
We also provide restaurant painting services. We can give you more information about these services if you give us a call.